Good to see you!
Welcome to Dulux
Terms and Conditions
Thanks!
Our latest tips and inspirations are on their way to your mailbox
Registration complete
Forgotten your password?
Please enter email address associated to your account
Password changed successfully
We successfully updated your personal details.
Forgotten your password?
For more tailored inspiration, please fill in the 3 questions below.
Thanks for registering
We will send you colourful news every now and then
Delete Account
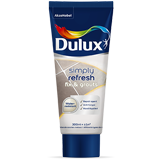
Dulux Simply Refresh Fix & Grouts
-
Finish N/A
-
Coverage 100 rft/kg
-
Drying Time 24 hours
-
Coats 1
-
Water resistant
-
Anti-Fungal
-
Ready to Use
-
Superior Adhesion
-
Grouting & repair agent
-
Hand Applied
-
Interior and Exterior
Product Description
specially designed to fix gaps on joints between tiles. It has excellent
adhesion to different substrates & can be used on a wide variety of
tiles. It is extremely resistant to water & fungal attacks.
Application Description
• Ensure that the surface to be applied is clean & dry. Any fungal growth should be removed
thoroughly.
Step 2 : Application Process
• Massage the tube gently before use.
• Remove the cap & cut the nozzle. Gently squeeze the tube into the joints and smooth with a
spatula or putty knife or moistened fingers.
• Wait for 30 minutes to remove excess material with a moist cloth.
Step 3 : Finishing
• Allow the material to dry completely for 24 hours before exposing to damp or wet conditions.
Drying time may vary according to temperature and humidity. For instance, drying time will be
significantly longer in cool and damp conditions.
Health & Safety
How much paint do I need?
More than one wall to paint? Try our advanced paint calculator
Measure the height and length of the surface you want to paint (in metres or centimetres).

Your Measurements:
{{!-- This value will be injected with JavaScript --}}
Amount needed:
{{!-- This value will be injected with JavaScript --}}
Actual coverage will depend on the conditions of the surface. If the colour change is strong, more coats may be required.
Add a new job
Add a new job
Edit a job
Delete job
Are you sure? All notes, photos and saved items will be deleted.
Save colour
Save to My Workspace
Add to job

Dulux Simply Refresh Fix & Grouts
Save job